Remote CoDaS Platform Setup
First, login to the platform (click here) using Globus with your CERN or university credntials.
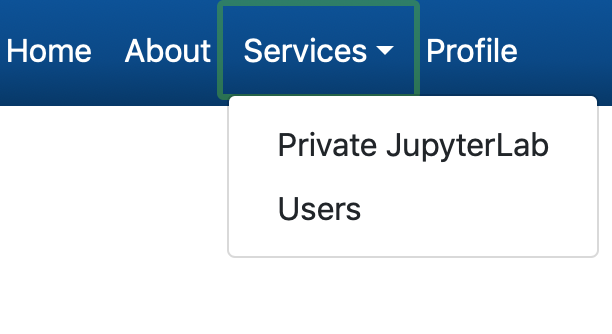
Using the bar at the top of the screen select Services -> “Private JupyterLab”

Then select "New Personal Lab"

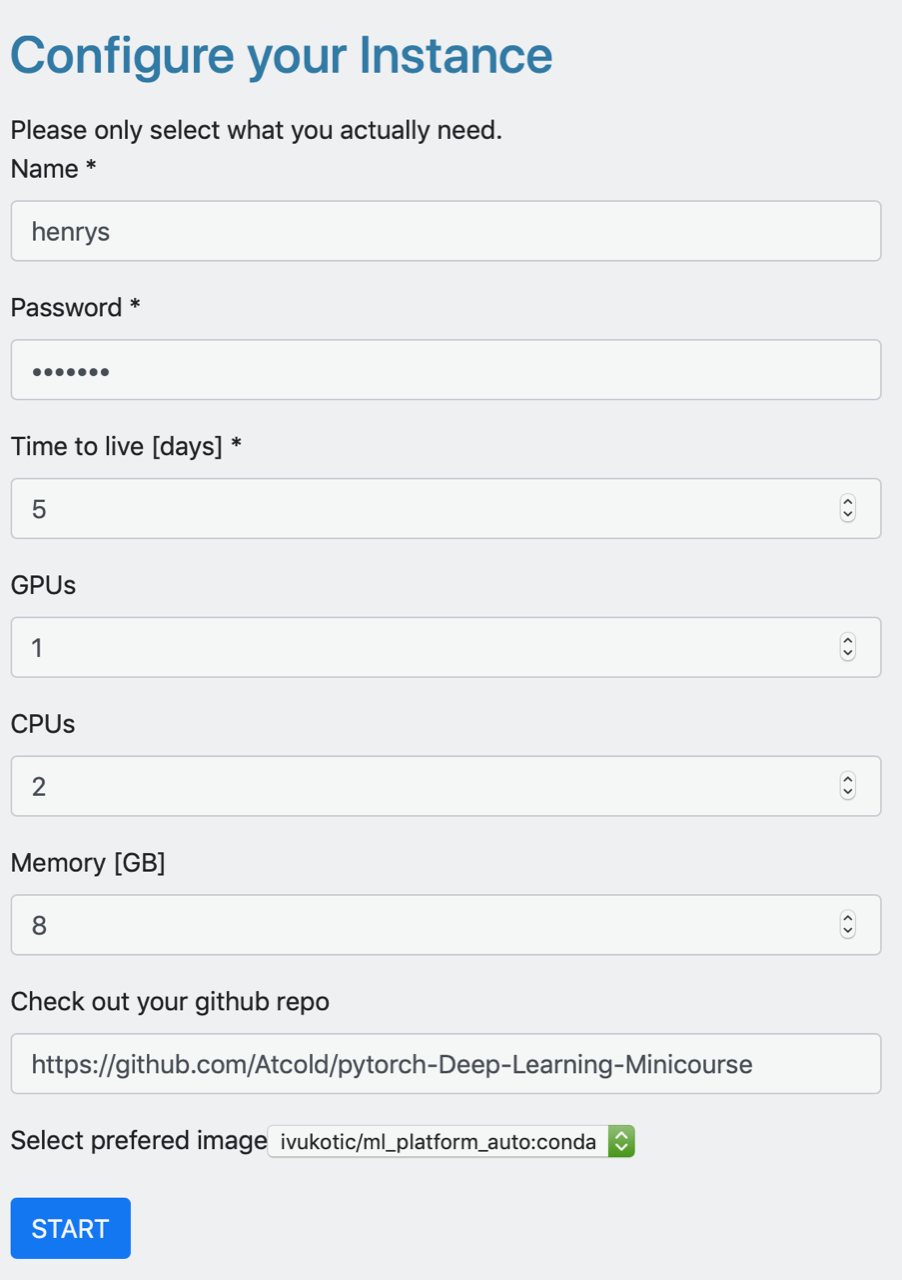
Fill out the form with appropriate settings to configure your lab
- Name: this needs to be unique for each instance so use something with e.g. your actual name
- Password: set your own password
- Time to live: 5 days is fine
- GPUs: 1 is fine
- CPUs: 2
- Memory: leave at 8
- Check out your github repo: Either
https://github.com/Atcold/pytorch-Deep-Learning-Minicourse.gitorhttps://github.com/jpivarski/2019-07-23-codas-hep.git. You can get the other one with agit clonelater. - Select preferred image: this must be set to the conda image

Click start. It will likely take a few minutes to setup; when it is running it will appear in your list of labs. It it does not show up after 10 minutes, delete the instance and try again.

Launch the lab by clicking on the link and entering your password from the setup step. You now have a CoDaS-HEP environment with many useful packages already installed. You can add additional packages to this environment or create an entirely new one if desired.
The repositories have recommended environments in files. To add these:
- Download the repository
- Open a terminal in jupyterlab
- Change to the directory you just downloaded; it will be in
/workspace. - Run
conda env create -f environment.yml
Now you should have a kernel choice with the correct repository.
If you need to download a new github repository:
cd /workspace
git clone <repo>